Zellige tiles are a key element of Moroccan craftsmanship, known for their vibrant colors and intricate geometric patterns. These handmade tiles are created using natural clay and traditional techniques passed down through generations.
In this article, we will explore the materials and tools essential for making Zellige tiles, outline the detailed crafting process, and highlight both the ancient and modern applications of these beautiful tiles.
Zellige tile production begins with the preparation of natural clay, followed by molding, drying, glazing, and firing. Artisans use traditional tools such as wooden molds and metal chisels to shape and cut the tiles, while kilns are essential for the final firing process.
We will delve into:
1. Materials and Tools: Understanding the natural resources and traditional tools used by artisans.
2. The Crafting Process: A step-by-step guide from clay preparation to the final product.
3. Traditional Techniques: Preserving heritage methods like hand-cutting and traditional glazing.
4. Modern Applications: How Zellige tiles are used in contemporary interior design and architecture.
Explore the comprehensive guide to Zellige tiles to gain a deeper understanding of this unique form of Moroccan artistry.
Section 1: Introduction to Zellige Tiles
1.1 Overview of Zellige Tiles
Zellige tiles are a traditional form of handmade terracotta tile that originates from Morocco. They are an integral part of Moroccan craftsmanship and are often associated with Islamic art due to their intricate geometric patterns and vibrant colors. These tiles are typically used to create detailed mosaics that decorate various architectural elements, including walls, floors, and fountains. The making of Zellige tiles is an ancient technique that has been passed down through generations, reflecting the rich cultural heritage of North African art.
1.2 Key Characteristics and Features
Zellige tiles are distinguished by several key characteristics:
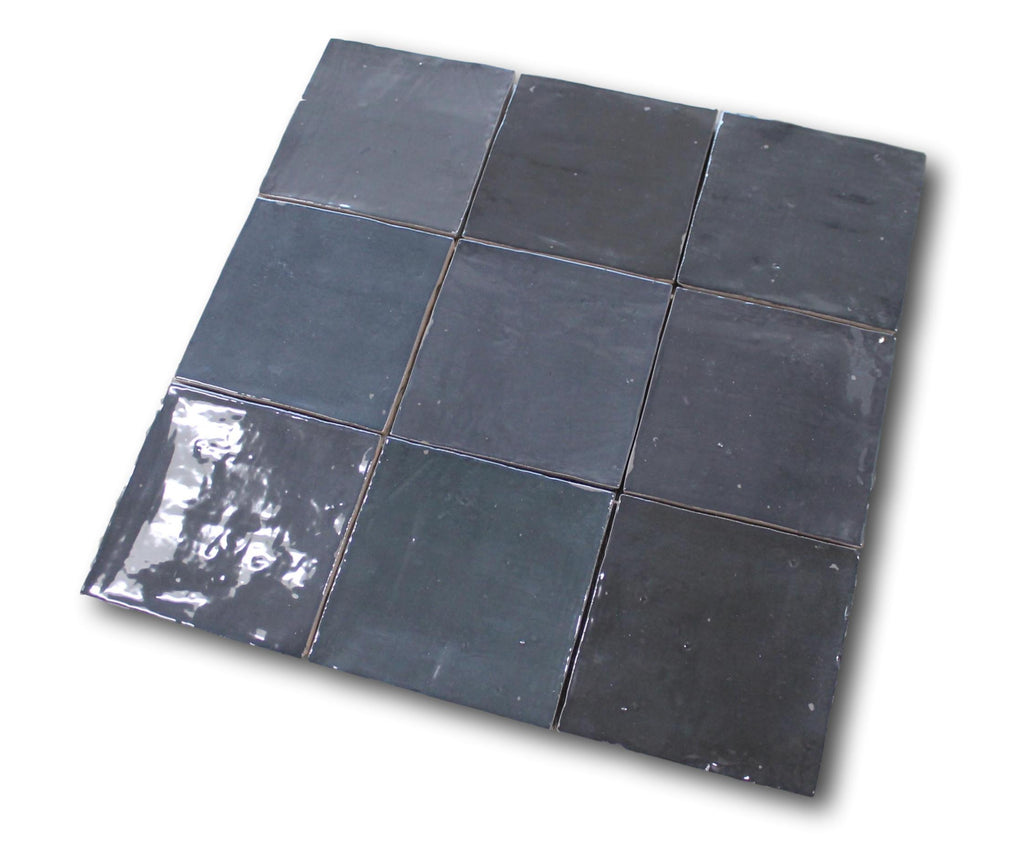
- Handcrafted Nature: Each tile is individually crafted by skilled artisans, resulting in unique variations that add to their charm.
- Geometric Patterns: The tiles are cut into precise geometric shapes, which are then assembled into intricate mosaics.
- Vibrant Colors: Natural pigments are used to glaze the tiles, creating a wide range of vibrant colors that are characteristic of Zellige mosaics.
- Traditional Techniques: The process of making Zellige tiles involves traditional methods such as hand-cutting and glazing, which contribute to their distinctive appearance.
- Durability: Fired in kilns, Zellige tiles are known for their strength and longevity, making them suitable for various applications.
1.3 Modern Relevance and Usage
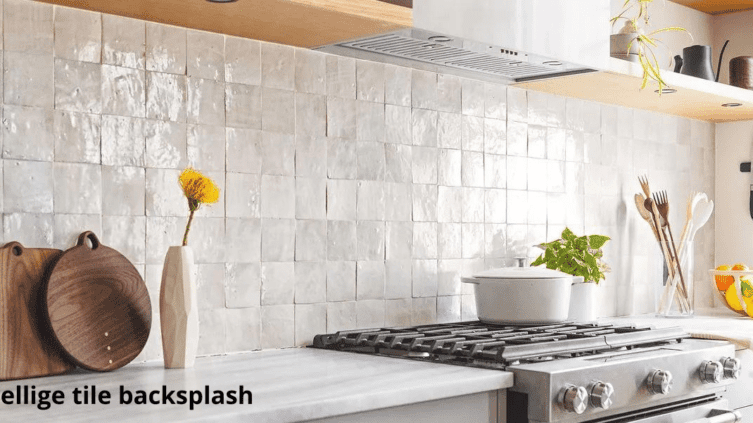
In contemporary times, Zellige tiles continue to be highly valued for their aesthetic appeal and versatility. They are used in modern interior design to create stunning feature walls, backsplashes, and decorative accents in kitchens and bathrooms. Architects incorporate Zellige tiles in both residential and commercial projects to add a touch of traditional Moroccan artistry. The blend of ancient techniques with modern design trends has ensured that Zellige tiles remain a popular choice for those seeking unique and timeless decor with almost the same materials and tools.
Section 2: Materials and Tools
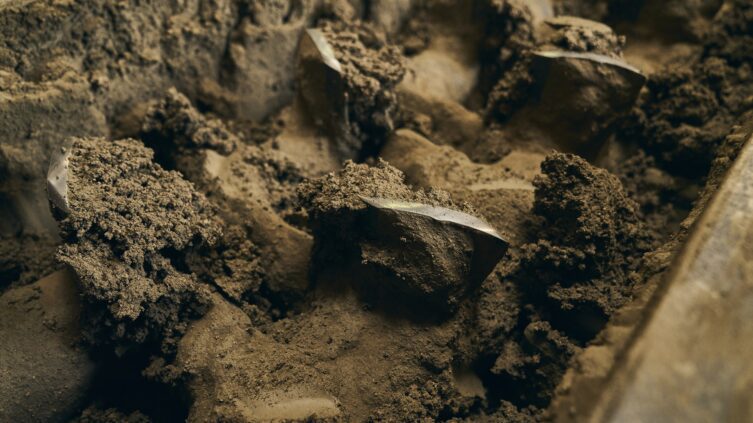
2.1 Natural Clay: Source and Preparation
Natural clay is the essential raw material used in the creation of Zellige tiles. This clay is typically sourced from specific regions known for their high-quality deposits, such as the Fez and Meknes areas in Morocco. The quality of the clay is crucial, as it determines the durability and workability of the tiles. Please read The Composition of Zellige.
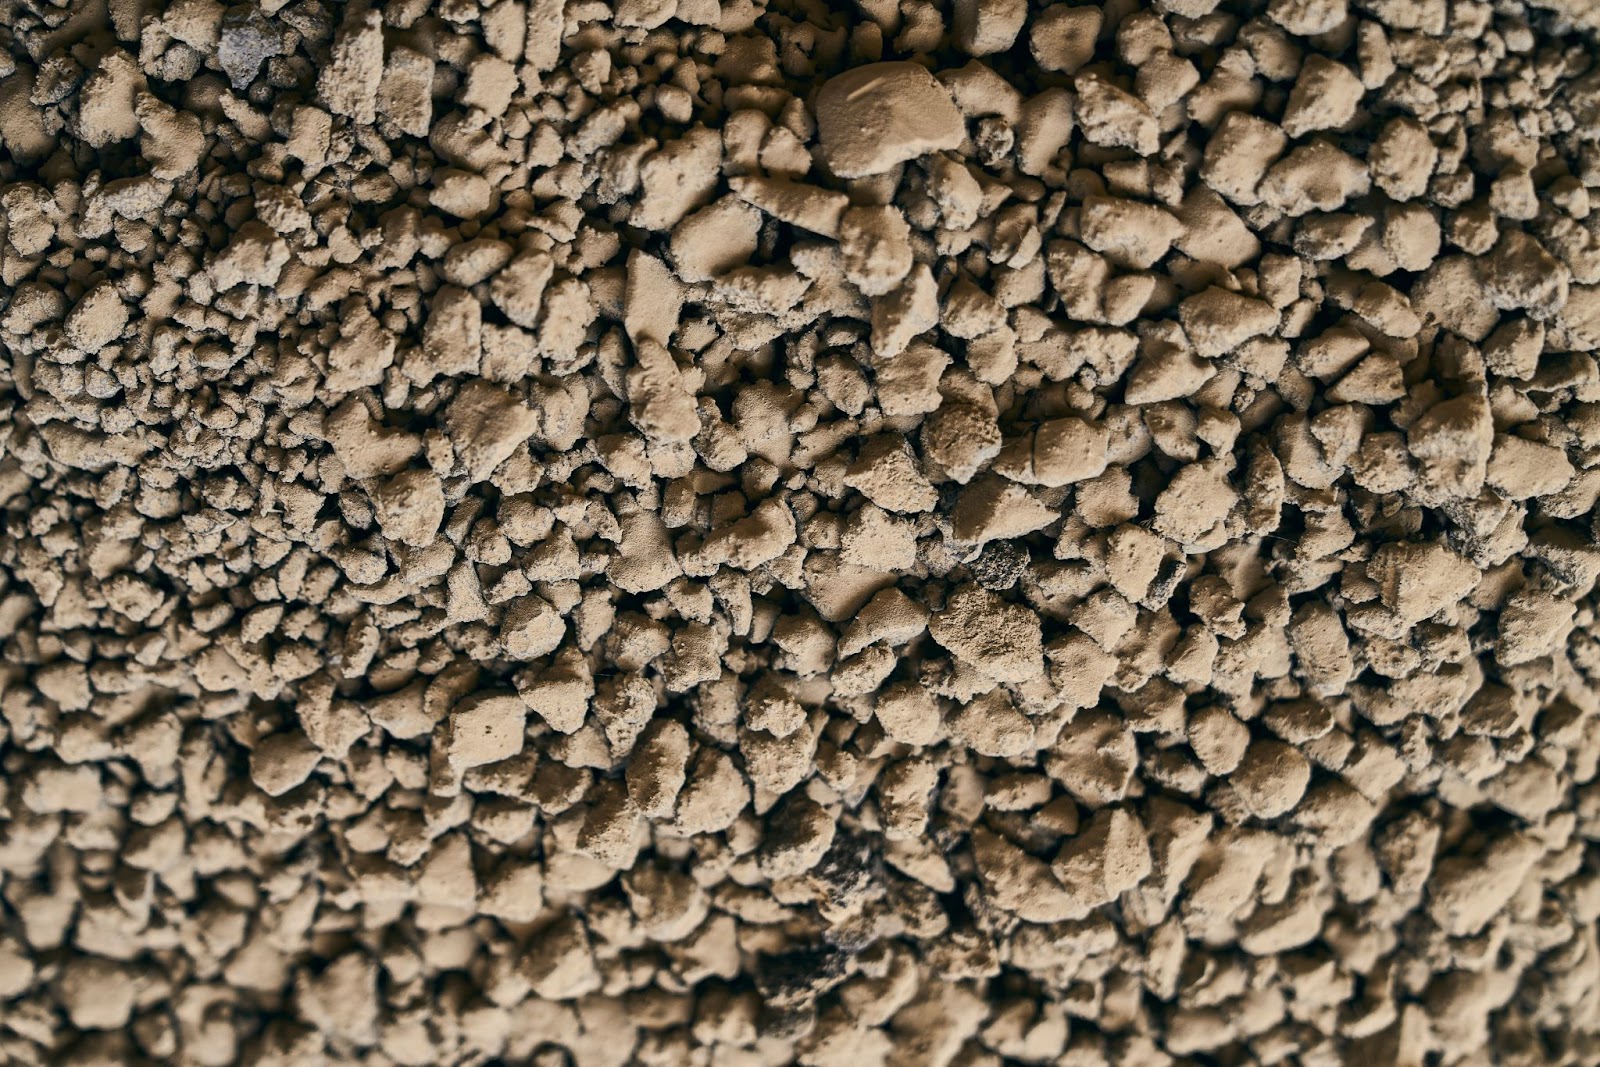
The preparation process involves several steps to ensure the clay is suitable for tile making: Extraction, Soaking, Filtering, Kneading and Resting.
Natural clay and pigments used for Zellige tiles are of the highest quality, providing a strong foundation for the intricate and beautiful tiles that are a hallmark of Moroccan craftsmanship.
2.2 Natural Pigments and Their Application
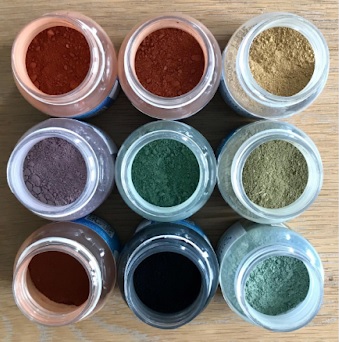
Natural pigments play a crucial role in the distinctive appearance of Zellige tiles. These pigments, derived from minerals and plants, are used to create the vibrant and varied colors that Zellige tiles are known for. The process of preparing these pigments involves 3 steps:
- Sourcing Pigments: The natural pigments are sourced from various minerals and plant-based materials. Common sources include cobalt for blue, copper for green, and manganese for brown and black. These pigments are chosen for their rich and lasting colors.
- Preparation: The raw pigments are ground into fine powders to ensure they can be evenly mixed with water or other binding agents. This fine grinding process is essential for achieving a smooth and consistent application.
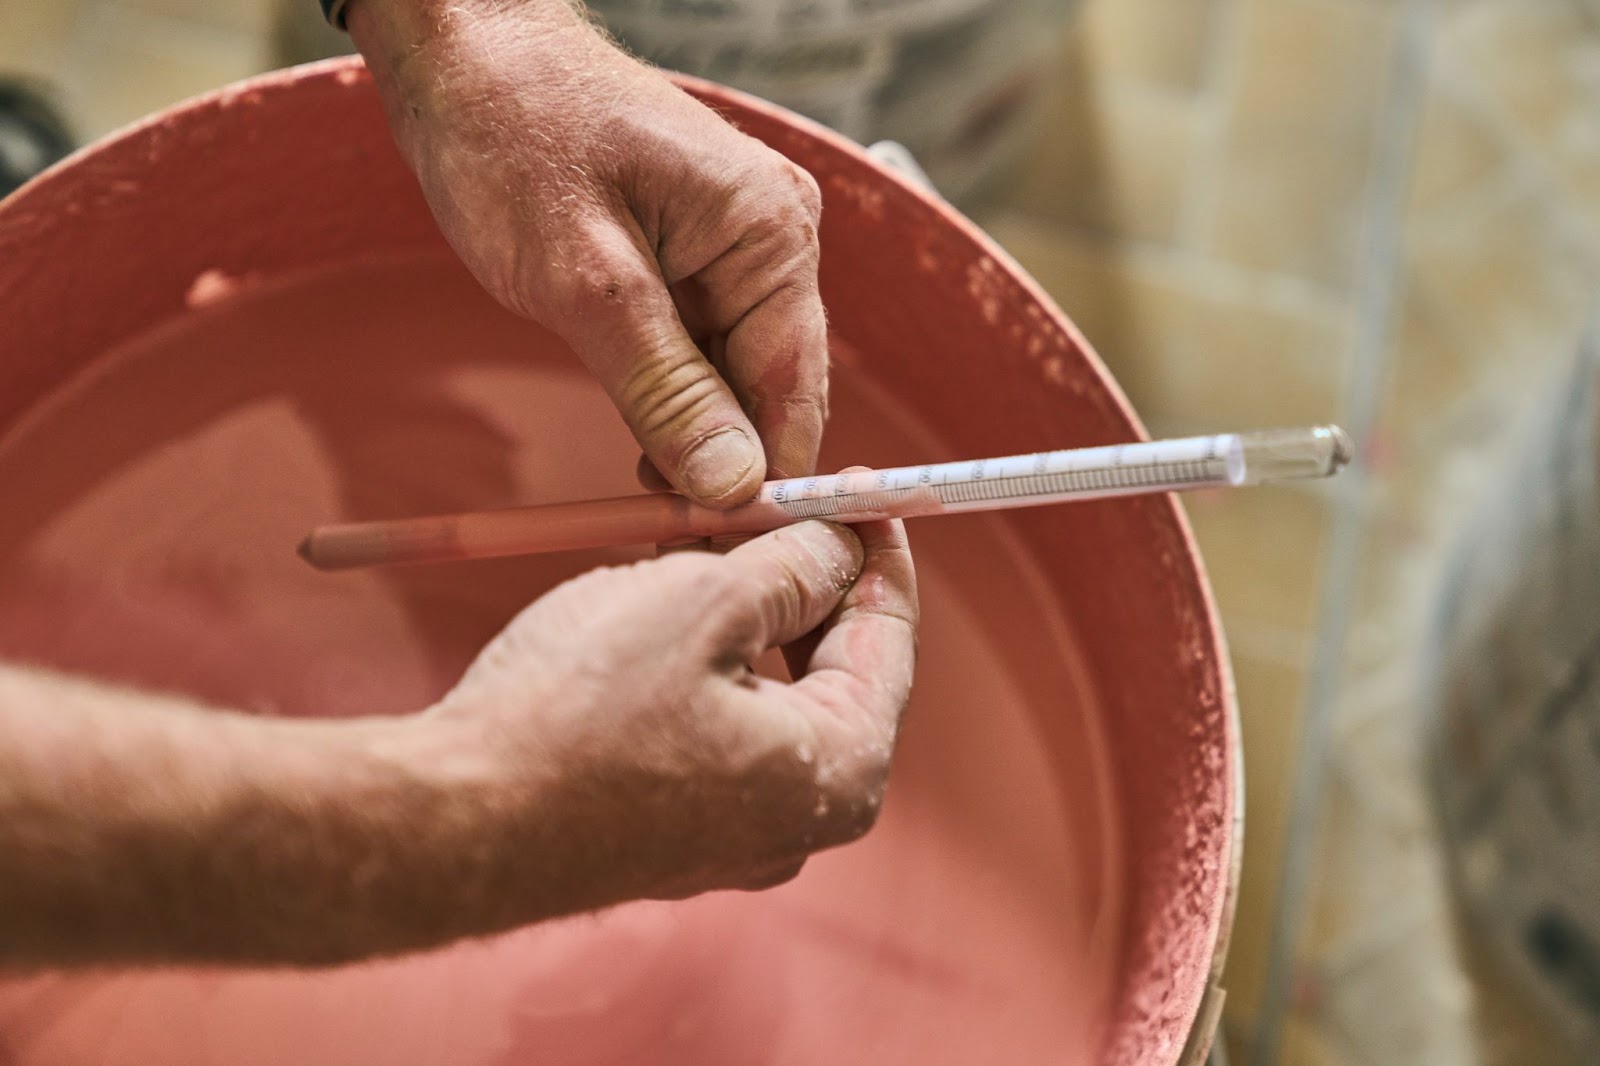
- Mixing: The powdered pigments are mixed with water to create a paint-like glaze. The ratio of pigment to water is carefully controlled to achieve the desired intensity and opacity of the color. Sometimes, other natural additives are included to enhance the adhesion and durability of the glaze.
The use of natural pigments not only provides Zellige tiles with their vibrant and varied colors but also ensures that the tiles maintain their beauty over time. This traditional method of coloring is a testament to the artisans’ expertise and their commitment to preserving the authenticity of Zellige tile-making with adequate tools.
2.3 Essential Tools Used by Artisans
Creating Zellige tiles involves the use of various traditional tools, each playing a vital role in the meticulous crafting process. These tools are essential for shaping, detailing, and finishing the tiles, ensuring that each piece meets the high standards of Moroccan craftsmanship.
Here are the key tools used by artisans in the production of Zellige tiles:
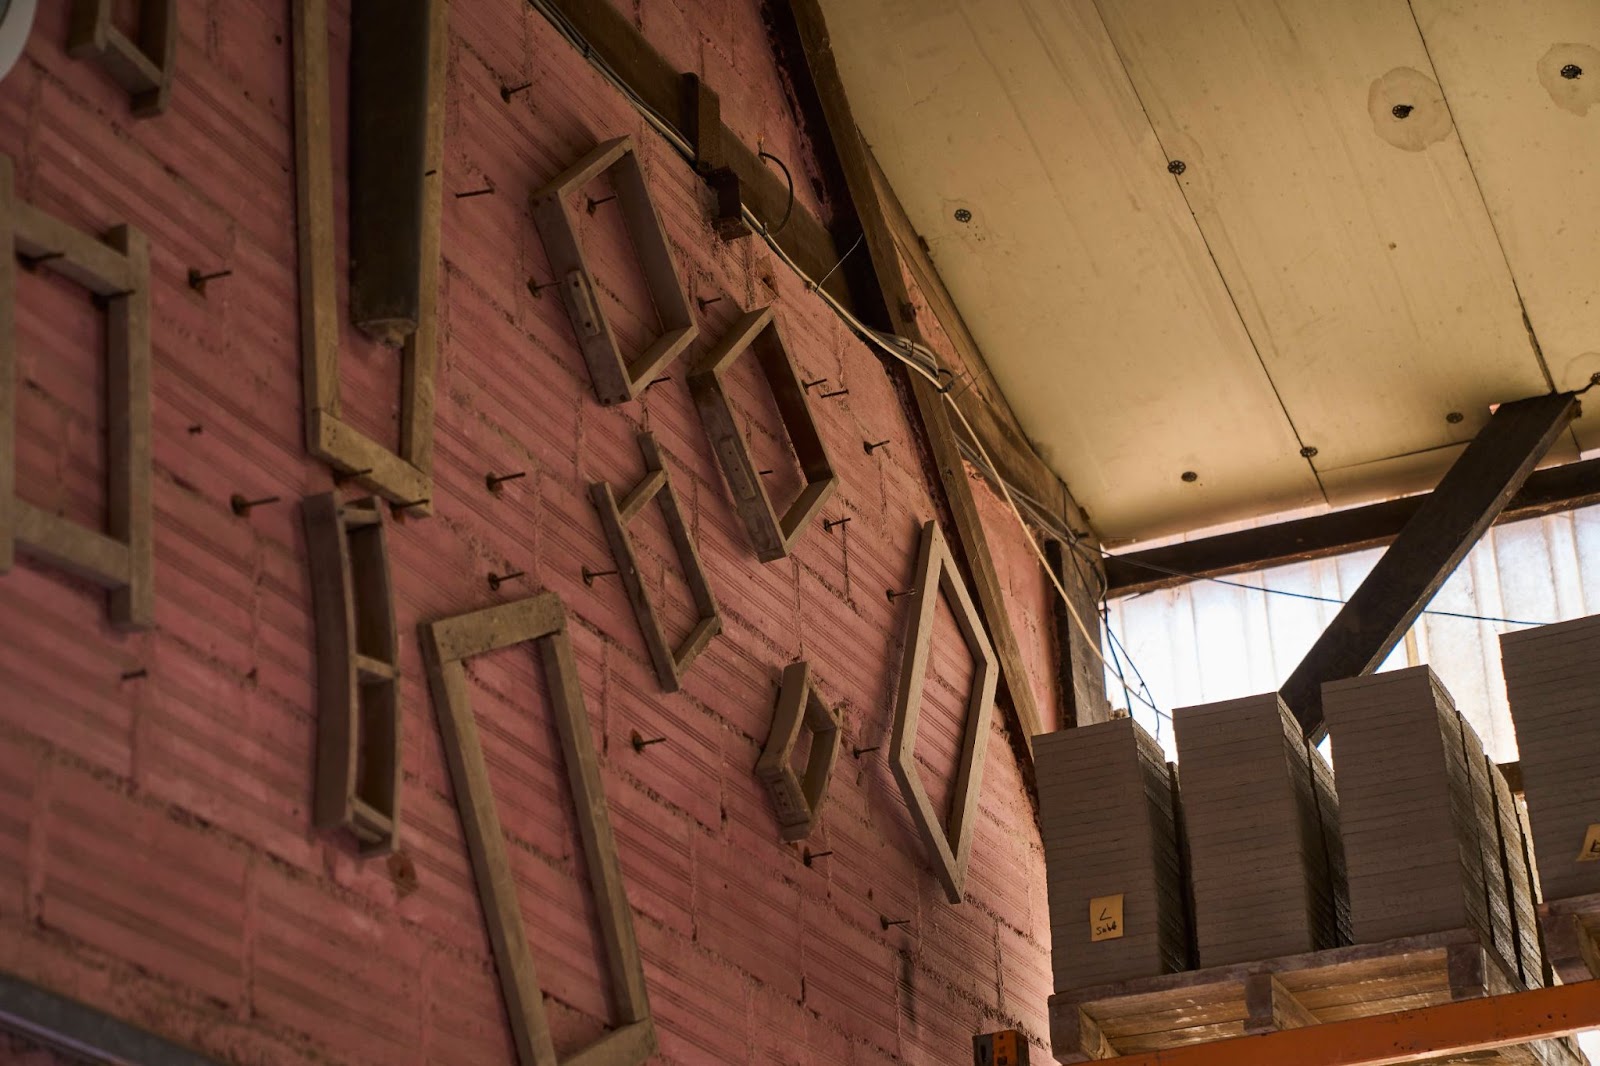
- Wooden Molds: Wooden molds are used to shape the raw clay into uniform tiles. The clay is pressed into these molds to form the basic shapes, ensuring consistency in size and thickness. This step is crucial for creating tiles that fit together seamlessly in intricate mosaic patterns.
- Metal Chisels: Metal chisels are indispensable for hand-cutting the tiles into precise geometric shapes. After the initial firing, artisans use these chisels to trim the tiles into various patterns, such as squares, triangles, and stars. This hand-cutting process requires precision and skill to achieve the sharp, clean edges necessary for detailed designs.
- Carving Tools: Specialized carving tools are used for detailing and refining the tile designs. These tools allow artisans to engrave intricate patterns and motifs into the clay before it is glazed and fired. The craftsmanship involved in this step adds depth and texture to the final product.
- Spatulas and Smoothing Tools: Spatulas and other smoothing tools help in applying and evenly spreading the glaze over the tiles. These tools ensure that the glaze covers the surface uniformly, which is essential for achieving the desired color and finish.
- Kilns: Kilns are essential for firing the tiles. They provide the high temperatures needed to solidify the clay and set the glaze, resulting in a hard, durable, and glossy finish. The type of kiln and the firing technique can influence the final appearance of the tiles, including their color and texture.
- Drying Racks: Before firing, the glazed tiles need to dry properly. Artisans use drying racks to carefully place the tiles, ensuring they dry evenly and without distortion. Proper drying is crucial to prevent cracks and ensure the quality of the final product.
These traditional tools, used in combination with the artisans’ expertise, enable the production of Zellige tiles that are both beautiful and durable. The use of these tools reflects the dedication to maintaining the authenticity and quality of Moroccan tile-making practices.
Section 3: The Crafting and Fabrication Process of Zellige Tiles
3.1 Preparing the Clay: Steps and Techniques
The preparation of clay is a fundamental step in the creation of Zellige tiles, ensuring that the raw material is of high quality and suitable for shaping and firing. The process involves several detailed steps and techniques:
- Extraction: The clay is sourced from specific regions known for their high-quality deposits. Artisans extract the clay from natural clay pits or riverbeds, selecting the best quality material with minimal impurities.
- Soaking: The extracted clay is soaked in water for several days. This soaking process helps to soften the clay, making it easier to work with and allowing any unwanted materials to be separated.
- Filtering: After soaking, the clay is filtered through fine sieves to remove stones, roots, and other impurities. This filtration ensures that the clay is smooth and homogeneous, which is crucial for creating consistent and durable tiles.
- Kneading: The filtered clay is then kneaded by hand or with mechanical tools. This step, akin to kneading dough, ensures an even texture and removes any remaining air pockets. Proper kneading is essential for achieving the right consistency, which is vital for molding and shaping.
- Resting: Once kneaded, the clay is left to rest for a specific period. This resting phase allows the clay to reach the optimal moisture content and ensures it is well-prepared for the next stages of tile-making.
- Storage: Prepared clay is often stored in a cool, damp place to maintain its workability. Artisans take care to keep the clay covered to prevent it from drying out prematurely.
These meticulous steps in preparing the clay ensure that the raw material is of the highest quality, ready for the intricate processes of molding, drying, glazing, and firing that follow in the production of Zellige tiles.
3.2 Molding and Shaping: Creating the Basic Tile
Molding and shaping the clay into basic tiles is a critical step in the Zellige tile-making process. This stage involves transforming the prepared clay into uniform shapes that can be further processed and refined.
The techniques and steps involved are as follows:
- Portioning the Clay: The kneaded clay is divided into manageable portions. Each portion is sized according to the desired dimensions of the tiles to ensure uniformity.
- Pressing the Clay into Molds: The portioned clay is pressed into wooden molds. These molds are designed to create tiles of specific sizes and shapes. The use of molds ensures that the tiles are consistent in thickness and dimension, which is essential for fitting them together in mosaic patterns.
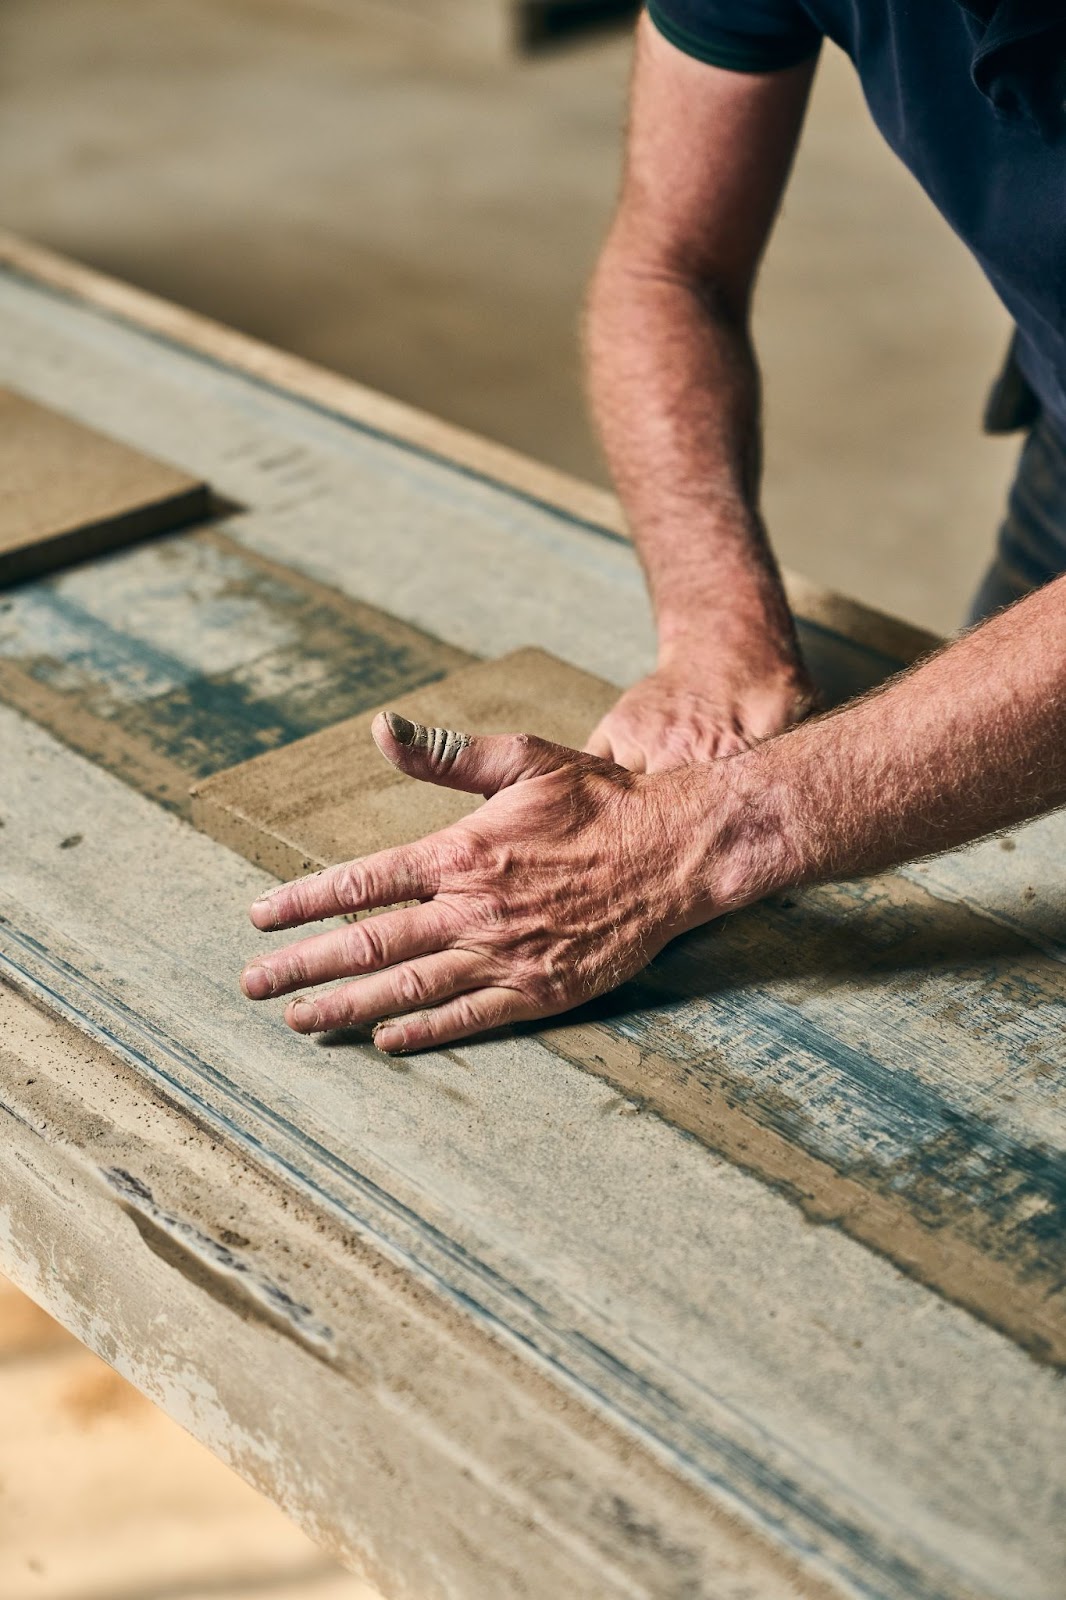
- Smoothing and Leveling: Once in the molds, the clay is smoothed and leveled using spatulas or similar tools. This step ensures that the surface of each tile is even and free of air pockets, which could cause cracks during drying and firing.
- Initial Drying: After molding, the tiles are carefully removed from the molds and placed on flat surfaces to begin the drying process. This initial drying step allows the clay to harden slightly, making it easier to handle in subsequent stages.
- Trimming and Refining: Any excess clay around the edges of the molded tiles is trimmed off, and the edges are refined to ensure they are smooth and straight. This step is crucial for achieving the precise geometric shapes needed for intricate mosaic designs.
- Resting Period: The shaped tiles are left to rest and continue drying. This resting period allows the clay to stabilize and reduces the risk of warping or cracking during the final drying and firing stages.
By following these detailed steps, artisans ensure that the basic tiles are well-formed and ready for the intricate processes of glazing, hand-cutting, and firing that will transform them into beautiful Zellige tiles. The precision and care taken during the molding and shaping phase are crucial for maintaining the quality and consistency of the final product.
3.3 Drying Process: Time and Techniques
The drying process is a critical phase in the production of Zellige tiles, as it ensures the stability and integrity of the clay before glazing and firing. Proper drying techniques and timing are essential to prevent warping and cracking. The steps and methods involved in the drying process are as follows:
- Initial Drying: After molding and shaping, the tiles are placed on flat surfaces in a well-ventilated area. This initial drying phase allows the tiles to harden slightly, making them easier to handle.
- Air Drying: The tiles are left to air dry for several days. This natural drying process can take anywhere from one to two weeks, depending on the climate and humidity levels. During this time, the moisture in the clay gradually evaporates, causing the tiles to harden.
- Turning and Rotating: To ensure even drying, the tiles are regularly turned and rotated. This prevents one side from drying faster than the other, which can lead to warping. Careful handling during this phase is crucial to maintain the shape and integrity of the tiles.
- Stacking with Spacers: If space is limited, tiles can be stacked with small spacers between them to allow air circulation. This technique helps to maximize the drying area while ensuring that each tile receives adequate airflow.
- Monitoring for Cracks: Throughout the drying process, artisans closely monitor the tiles for any signs of cracking or warping. Early detection allows for corrective measures to be taken, such as adjusting the drying environment or repairing minor cracks before they worsen.
- Final Drying Stage: Once the tiles have lost most of their moisture content, they enter the final drying stage. This can involve placing the tiles in a controlled environment with low humidity to ensure they are thoroughly dry before glazing.
- Pre-Glazing Inspection: Before proceeding to the glazing stage, each tile is inspected to ensure it is completely dry and free from defects. Any tiles that do not meet the quality standards are set aside for reworking or discard.
By carefully managing the drying process, artisans ensure that the Zellige tiles are properly prepared for the subsequent steps of glazing and firing. This meticulous approach helps to preserve the quality and durability of the final product, ensuring that the tiles are both beautiful and long-lasting.
3.4 Glazing: Techniques and Materials
Glazing is a crucial step in the creation of Zellige tiles, as it adds the distinctive vibrant colors and glossy finish that these tiles are renowned for. This process involves applying a layer of glaze, made from natural pigments and other materials, to the surface of the dried tiles.
The following outlines the techniques and materials used in glazing Zellige tiles:
- Preparation of Glaze:
- Natural Pigments: The glaze is made from natural pigments sourced from minerals and plants. Common pigments include cobalt for blue, copper for green, and manganese for brown and black.
- Mixing: These pigments are ground into fine powders and mixed with water and other natural additives to form a liquid glaze. The consistency of this mixture is carefully controlled to ensure even application.
- Application Techniques:
- Brushing: One common method involves using brushes to apply the glaze to the surface of the tiles. This technique allows for precise control and is often used for detailed or multi-colored designs.
- Dipping: Another method is to dip the entire tile into the glaze mixture. This ensures a uniform coating but requires careful handling to avoid drips and uneven coverage.
- Pouring: In some cases, the glaze is poured over the tiles. This method is typically used for larger tiles or when a thick glaze layer is desired.
- Drying the Glaze:
- After application, the glazed tiles are left to dry in a controlled environment. This drying period is crucial to ensure that the glaze sets properly and adheres evenly to the tile surface.
- Avoiding Contamination: Care is taken to avoid dust and other contaminants during this drying phase, as they can affect the quality of the glaze.
The careful preparation and application of the glaze, followed by precise firing, ensure that each tile meets the high standards of quality and beauty that Zellige tiles are known for.
3.5 Firing the Tiles: Finalizing the Product
Firing is the final and most critical step in the production of Zellige tiles. This process transforms the glazed clay into durable and vibrant tiles ready for use. Proper firing techniques ensure that the tiles achieve their characteristic strength and glossy finish.
The following outlines the key aspects of the firing process:
- Loading the Kiln:
- Placement: The glazed tiles are carefully placed in the kiln. Artisans ensure that each tile has enough space around it to allow for even heating and to prevent the tiles from sticking to each other.
- Supports: Sometimes, ceramic supports or kiln furniture are used to hold the tiles in place and ensure they remain flat during firing.
- Temperature Control:
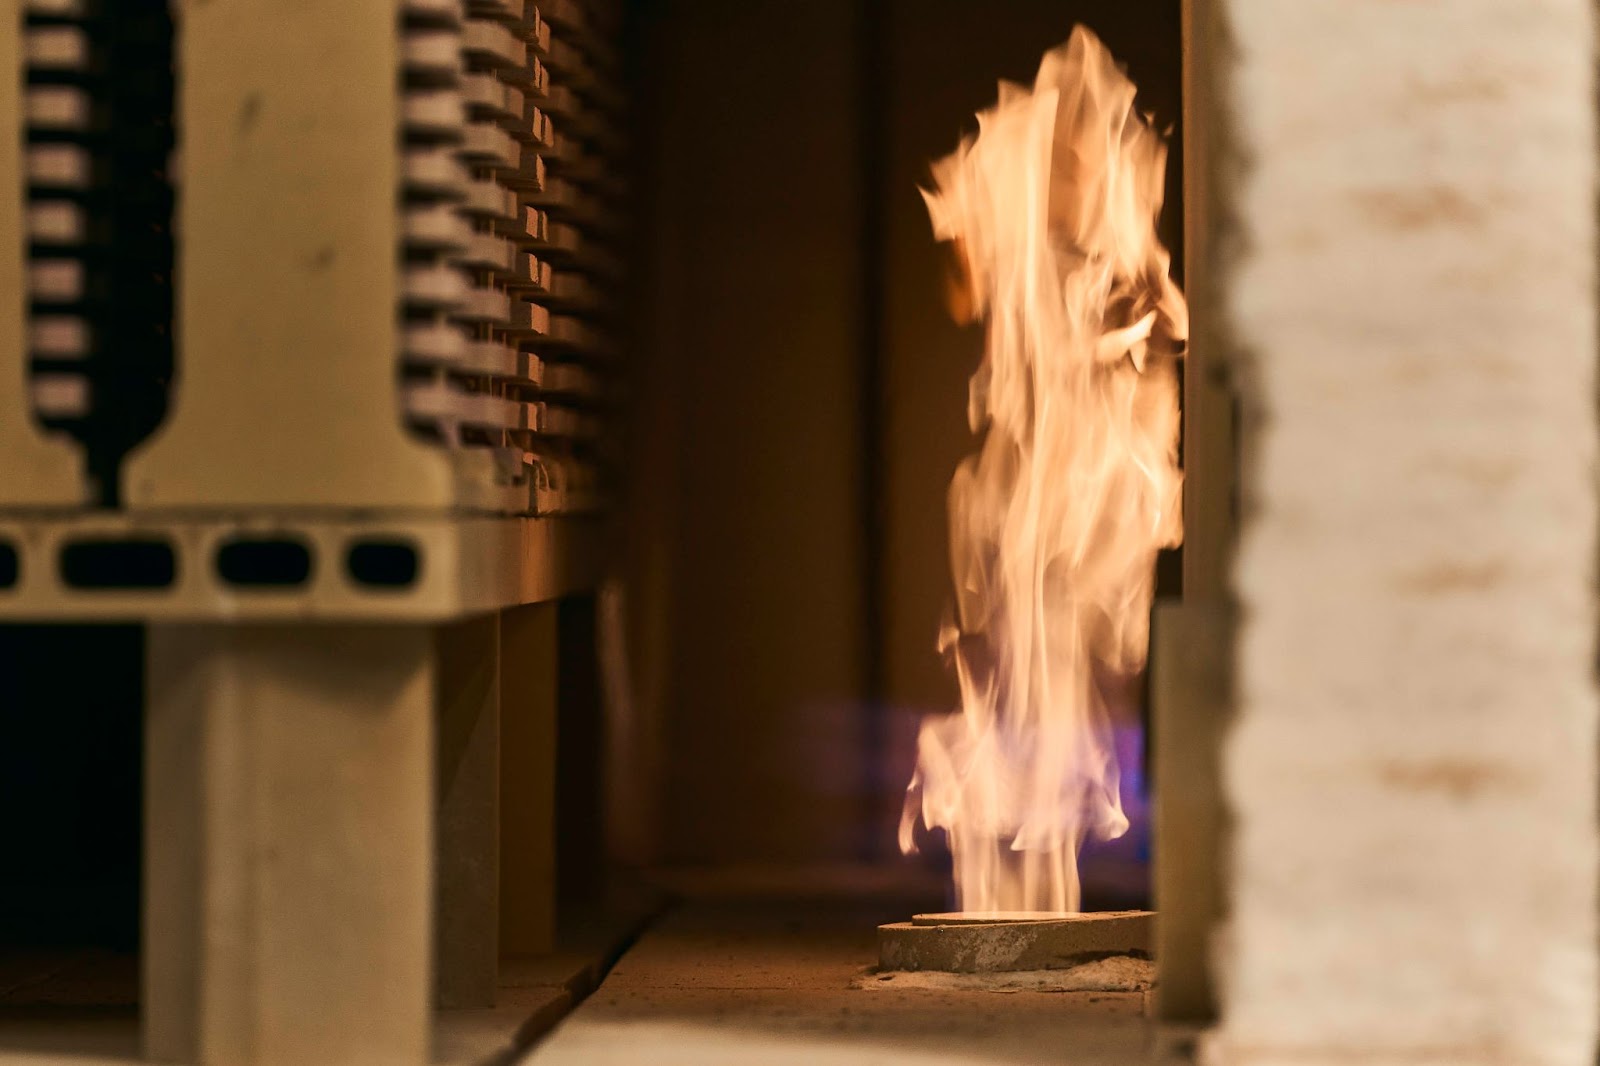
- Ramp-Up: The kiln is gradually heated to the desired temperature, typically between 900°C and 1000°C. This gradual increase helps to avoid thermal shock, which can cause cracking or warping.
- Peak Temperature: The kiln maintains the peak temperature for a specific period to ensure that the glaze melts and fuses properly with the clay body.
- Heat Soak:
- Uniform Firing: A heat soak period at the peak temperature allows the heat to penetrate evenly through the tiles. This step ensures consistent firing across all tiles and helps achieve uniform glaze results.
- Uniform Firing: A heat soak period at the peak temperature allows the heat to penetrate evenly through the tiles. This step ensures consistent firing across all tiles and helps achieve uniform glaze results.
- Cooling Down:
- Gradual Cooling: After the peak firing period, the kiln is slowly cooled down. Rapid cooling can cause the tiles to crack due to thermal stress, so controlled cooling is essential.
- Final Hardening: During this phase, the tiles solidify completely, and the glaze achieves its final, glossy appearance.
- Unloading the Kiln:
- Handling: Once cooled to room temperature, the tiles are carefully removed from the kiln. At this stage, the tiles are strong but still need careful handling to avoid chipping or damage.
- Handling: Once cooled to room temperature, the tiles are carefully removed from the kiln. At this stage, the tiles are strong but still need careful handling to avoid chipping or damage.
- Quality Inspection:
- Surface Check: Each tile is inspected for surface defects such as cracks, bubbles, or uneven glaze coverage.
- Dimensional Accuracy: The tiles are also checked for dimensional accuracy and flatness, ensuring they meet the required standards for installation.
- Sorting and Grading:
- Categorizing: Tiles are sorted based on their quality, color consistency, and overall appearance. High-quality tiles are selected for premium projects, while others may be used for less demanding applications.
The firing process is crucial in finalizing Zellige tiles, ensuring they are both durable and aesthetically pleasing. The careful control of temperature and cooling, combined with thorough quality inspections, guarantees that each tile meets the high standards of Moroccan craftsmanship.
Section 4: Traditional Techniques
4.1 Hand-Cutting: Precision and Skill
Hand-cutting is a cornerstone of traditional Zellige tile production, requiring remarkable precision and skill. Artisans use metal chisels to manually cut each tile into exact geometric shapes. This meticulous process ensures that each piece fits perfectly into complex mosaic patterns. The precision involved in hand-cutting highlights the artisan’s expertise and dedication to maintaining the authenticity and quality of Zellige tiles.
4.2 Applying Traditional Glazing Methods
The glazing of Zellige tiles employs traditional methods that have been passed down through generations. Natural pigments, derived from minerals and plants, are used to create vibrant and lasting colors. The glaze is carefully applied by hand, often with brushes, to ensure even coverage. This method not only enhances the aesthetic appeal of the tiles but also preserves their historical authenticity. The use of traditional glazing techniques ensures that each tile has a unique finish, adding to its charm and individuality.
4.3 Unique Geometric Designs
Zellige tiles are renowned for their intricate geometric designs, a hallmark of Islamic art. These designs are created through meticulous planning and handcrafting, with each tile being cut and placed to form elaborate patterns. The geometric precision and symmetry are not only visually stunning but also carry cultural and historical significance. These unique designs reflect the rich artistic heritage of Morocco and the artisans’ commitment to preserving traditional aesthetics.
These traditional methods not only produce high-quality tiles but also honor the long-standing traditions of Moroccan craftsmanship, ensuring that the art of Zellige tile making remains vibrant and relevant today.
Section 5: Modern Applications
5.1 Contemporary Uses in Interior Design
Zellige tiles have found a prominent place in contemporary interior design. Their vibrant colors and intricate patterns add a unique aesthetic to various spaces. They are commonly used as feature walls, backsplashes in kitchens, and decorative accents in bathrooms. The artisanal quality of Zellige tiles brings a touch of traditional craftsmanship into modern interiors, making them a popular choice for designers seeking to create spaces that blend old and new.
5.2 Zellige in Modern Architecture
In modern architecture, Zellige tiles are used to enhance the visual appeal of buildings. Architects incorporate these tiles in both exterior and interior designs, leveraging their durability and beauty. Zellige tiles can be found in public spaces such as lobbies, hotels, and museums, where their intricate patterns and vibrant hues create a striking visual impact. The use of Zellige tiles in modern architecture demonstrates how traditional materials can be adapted to contemporary design principles.
5.3 Trends in Home Decor
Zellige tiles have become a trend in home decor, favored for their versatility and aesthetic appeal. Homeowners and decorators use these tiles to create eye-catching backsplashes, fireplace surrounds, and accent walls. The trend towards natural and handmade products in home decor has increased the popularity of Zellige tiles, as they offer a unique, handcrafted look that mass-produced tiles cannot match. Their ability to complement various styles, from rustic to modern, makes them a versatile choice for home decor.
5.4 Notable Renovation Projects Featuring Zellige Tiles
Several notable renovation projects have featured Zellige tiles, showcasing their timeless appeal and adaptability. Historic buildings being restored often incorporate Zellige tiles to maintain their authentic look while adding a fresh, modern twist. Contemporary renovations also use these tiles to introduce traditional Moroccan artistry into new spaces. High-profile projects, such as boutique hotels and luxury residences, often highlight Zellige tiles as a key design element, demonstrating their ability to elevate the aesthetic quality of any renovation.
Q&A: Frequently Asked Questions About Zellige Tiles
Why is Zellige Tile So Thick? Zellige tiles are thick to ensure their durability and strength. The thickness also allows for intricate hand-cutting and shaping, essential for creating detailed mosaic patterns.
What Makes Zellige Tiles Unique Compared to Other Tiles? The uniqueness of Zellige tiles lies in their handcrafted nature, vibrant colors, and intricate geometric patterns. Each tile is individually made, resulting in variations that add to their charm and authenticity.
How Long Does it Take to Make a Zellige Tile? The production of a Zellige tile can take several weeks, from preparing the clay to firing the final product. The process involves multiple steps, each requiring time and precision.
How Has the Production of Zellige Tiles Changed Over Time? While modern tools and techniques have been introduced, many artisans continue to use traditional methods. The essence of the craftsmanship has remained largely unchanged, preserving the heritage of Zellige tile-making.
Are Zellige Tiles Eco-Friendly? Zellige tiles are eco-friendly as they are made from natural materials and pigments. The traditional production methods also emphasize sustainability and minimal environmental impact.
What Are the Most Popular Applications for Zellige Tiles Today? Today, Zellige tiles are popular in both residential and commercial settings. They are commonly used in kitchens, bathrooms, feature walls, and as decorative elements in various architectural projects.
How to Identify Authentic Zellige Tiles? Authentic Zellige tiles can be identified by their handcrafted nature, slight imperfections, and vibrant colors. They often have a glossy finish and exhibit the unique characteristics of traditional Moroccan craftsmanship.